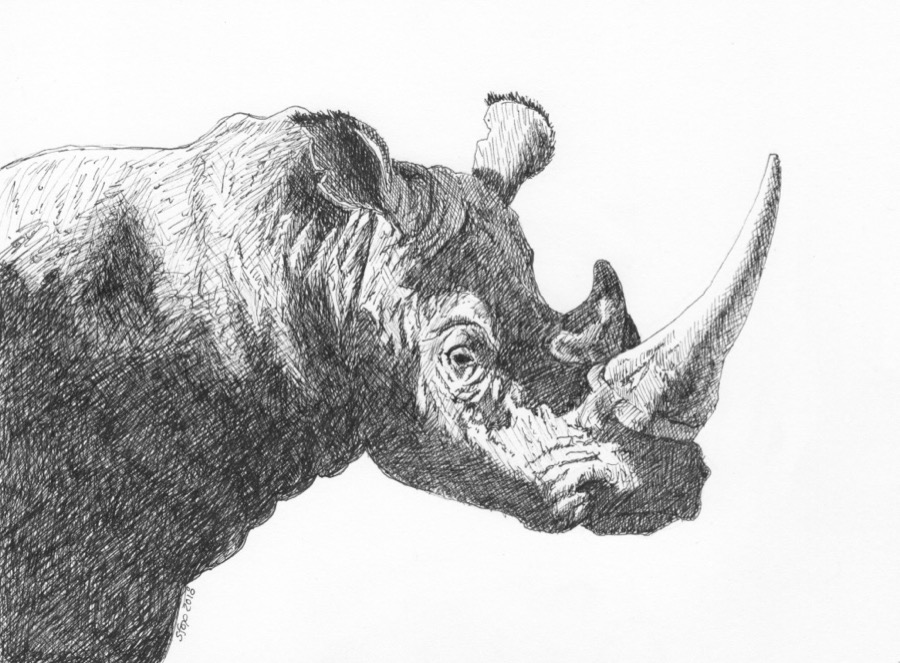
Continuing on from Part 1, which you can read here, I want to show you another way to approach seeing the big shapes and capturing those before you dive into detail. At the top is a finished pen and ink drawing of a white rhino. But you can draw just this…
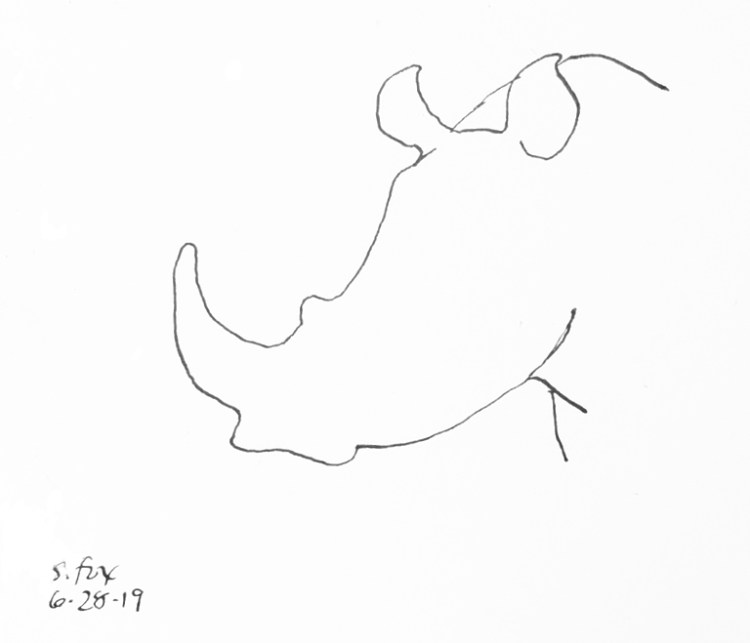
and anyone who has seen one will know that it’s a rhinoceros. No more is needed. The advantage of thinking this way is that it gives you the maximum freedom and control to decide how far you want to take a drawing or painting. You can continue to render the whole thing or perhaps choose to only finish one part, say, around the eyes. Those decisions are part of what separates one artist’s style from another’s.
Now I’ll show you a couple of quick sketch demos:
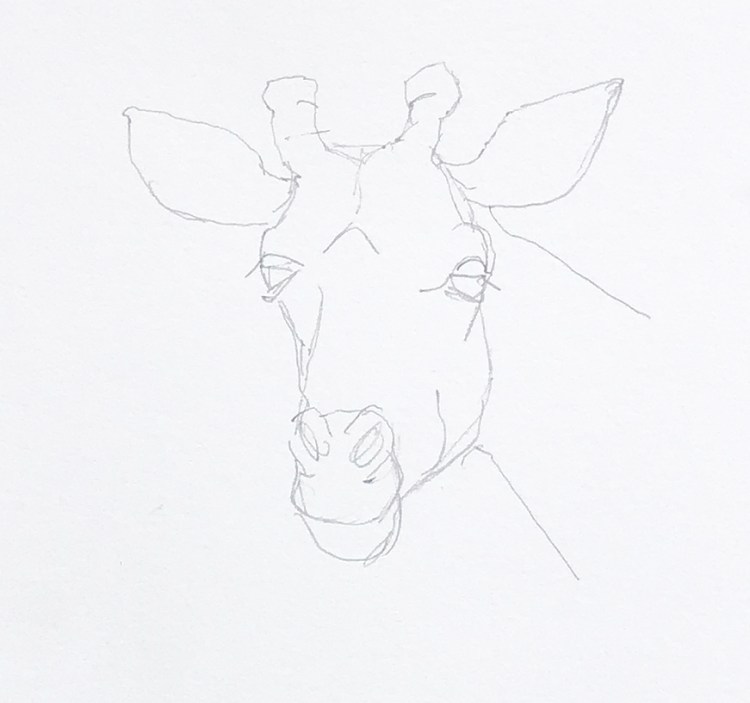
For the giraffe above, I started with an pencil underdrawing, only concerned with the shapes and their relationships in order to get the drawing right. Notice that I didn’t do any markings. But you still know it’s a giraffe.

I then inked over the drawing. Once again, you know it’s a giraffe. The next step would be to add the markings and finish the other features like the inside of the ears.

And, for the last example, here’s a cheetah. The head shape and the black marking under the eye identifies it easily without any spots. It doesn’t matter how great the spots are if the head is badly or incorrectly drawn. So first things first.

Starting with a correctly drawn head I now add the spots and shadow shapes. All of the ink drawings were done with a Perry and Co. ‘Saxon’ 87M dip pen nib on Strathmore 300 vellum bristol.
Here’s a photo for you to work from. You can do just the head, then the whole animal. See if you can find 3-4 different ways to work from it. TIhink about not just “a bison” but also “light side/shadow side”. The shapes of shadows should be drawn with the same amount of intention and care as the animal itself.

If you have any questions please post them in the comments!

Leave a comment